What's In Store at Wrightslaw?
![]()
Special Ed Law & Advocacy Training (6.5 hrs)
25% Off the Wrightslaw Bundle of 4 PRINT books for $58.35 (Sorry, coupons not accepted on this product)
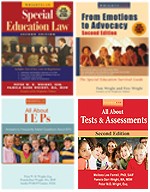
Includes Wrightslaw: Special Education Law, 2nd Ed., Wrightslaw: From Emotions to Advocacy, 2nd Ed., Wrightslaw: All About IEPs and Wrightslaw: All About Tests and Assessments, 2nd Ed.
New! The Wrightslaw Bundle is now available as an immediate PDF download. All four Wrightslaw books as PDFs for just $49.95!
![]()
"Do the hard jobs first. The easy jobs will take care of themselves."- Dale Carnegie
The special education system generates mountains of paper. You need a simple, foolproof document management system.
In Wrightslaw: From Emotions to Advocacy, we teach you how to organize your child's file. After you organize all the information about your child, you will have a clearer understanding of your child's disability and educational needs.
Document Management System
Think about the last school meeting. Did the IEP team members have a complete copy of your child's file? Did you have a complete copy of your child's file? How can the IEP team make decisions about your child's special education program if they do not have complete, accurate information about your child?
Schools keep records in different places. Information and reports are misplaced.
When you organize your child's file, you will have all the information about your child in one place. With our document management system, you can track your child's educational history. When you use this parent-tested system, you can quickly locate any document in your child's file.
When you take your organized file to the next school meeting, you will understand the power of getting organized. You will gain a sense of control.
Gather Information About Your Child
Follow these steps to get information about your child.
Make a Master Provider List
Make a list of all individuals and agencies that may have information or records about your child. Your list should include the names and titles of all professionals who have provided medical or mental health treatment services, including doctors, therapists, and other health care providers. Include their addresses, telephone and fax numbers, and email addresses. You may want to develop your list by category of service rendered, e.g., medical, educational, psychological evaluations.
Request Your Child's Records
Send a letter to all individuals and agencies on your list and request a copy of your child's records. Explain that your request relates to a school issue and the need to secure an appropriate education for your child. Ask if you should expect to pay a photocopying fee and what this fee will be.
Your letters should be neat and convey a professional image.
Tip: See Chapter 23 in Wrightslaw: From Emotions to Advocacy for sample letters to request information and records.
If you do not receive a response within ten days, send a short letter explaining that you requested information ten days ago and have not received a response. Attach a copy of your original letter to the second request letter. Ask if you can do anything to help expedite the request. Offer to visit the office to help copy the information. Be polite.
Tip: Make photocopies of all letters for your file.
Request Your Child's Educational Records
Write a letter to the school and request a complete copy of your child's entire cumulative file and confidential file, omitting nothing. You want copies of all evaluations, records, correspondence, and other documents the school has about your child. Use a word processor for your letter. Expect to pay a reasonable photocopying fee.
Tip: See more sample letters at the end of Chapters 23 and 24 in Wrightslaw: From Emotions to Advocacy.
Send one letter to the principal of your child's school and one letter to the director of special education. If you do not know the director's name and address, call the main office of the school district and request this information. If your child does not attend a public school, send the letter to the principal of the last public school your child attended.
Before you mail these letters, sign them and make copies of the signed letters for your Master File. Log the letters into your contact log.
Organizing the Master File
You will organize and file all information about your child in three-ring notebooks. Gather all documents that relate to your child. Bring all paper in boxes, file folders, and bags together in one place. Begin by organizing the documents by year.
Step 1: Date All Documents
With a pencil, lightly write the date of each document in the lower right corner of the first page (Example: 07/21/08).
Tip: Use a soft lead pencil when you date the documents. You may need to erase your notations later.
Before long, mail will roll in from your requests. Using a pencil, lightly date each document in the lower right hand corner. Date everything ? evaluations, reports, correspondence, report cards, and medical reports.
When you find duplicate documents, compare the duplicates, decide which document has the best photocopy quality, and use this as your master. Put the duplicates in a box. You will not need them for your notebook. Do not throw them away. You may need to provide copies to other people later.
Tip: Do not write on original documents. You may need copies of these documents later.
Many parents say that when they organize documents, they begin to read and are sidetracked. Force yourself to stick with this job until you finish. Do not stop to read the documents. Just date and organize! Lightly pencil the date on the bottom right corner of the first page.
Tip: Work samples provide useful information about your child's skills. Include a few samples of your child's schoolwork.
Step 2: File All Documents in a Three-Ring Notebook
Hole-punch, then file all dated documents in a large three-ring notebook. When you hole-punch, be careful that you do not destroy important signatures or dates. When documents are formatted horizontally, hole-punch on the top edge.
File all documents in chronological order, oldest document on top and newest document at the end. Some parents use the child's birth certificate as the first document in the file. The last document is the most recent piece of information. This may be a report card, IEP, or letter from the school.
Tip: Do not put documents in clear plastic envelopes. If you are in a meeting and need to find a document in the file, removing documents from plastic envelopes takes too long.
Do not file documents by category (i.e., IEPs, psychological evaluations, correspondence, etc.). If you file documents by category, your system will fail. Assume you have a comprehensive letter written by a child psychologist three years ago. The Eligibility Committee and the IEP team used the psychologist's letter. Is this document a letter? A report? An evaluation?
Trying to figure out categories is confusing and time-consuming. If your system is confusing and difficult, it will fail. Use our parent-tested system. You have better things to do with your time!
Step 3: Read the Master File for the "Big Picture"
After you complete Step 2, read your child's Master File from beginning to end. When you read the information chronologically, you will see the big picture.
At the beginning of this article, we mentioned the mountains of paper generated by the special education system. After reports are written, they are filed away. Few people will read or review this information again.
Because there is no master plan, no one looks at the big picture.
Instead of looking at the forest, parents and school staff focus on the bark of the trees. When you organize your child's file, you will see the forest. You will understand. Many parents say that making a neat, organized, chronological Master File is a powerful educational experience for them.
Create Your Document List
You have dated the documents and filed them in chronological order, oldest document on top, most recent on the bottom. Now you need to create your Master Document List. When you organize documents chronologically and generate your Master Document List, you can compress your child's history into a few pages. You can locate any document in seconds.
Tip: If you want to make a note on a document in your Master File, write on a sticky note that you attach to the document.
To create your Master Document List, make a table with four columns. If you are using a word processing program, insert a four-column table. If you are not using a computer, draw a table with four columns on several sheets of paper. Label the columns: Date, Author, Type, and Significance.
Date |
Author |
Type |
Significance |
Enter each document by date, author, and type. You can leave the "Significance" column blank for now.
Download Sample Document List in pdf.
Attach sticky notes to all pages in your Master File that have test scores (i.e., the Wechsler Intelligence Test and Woodcock Johnson Tests.)
Tip: If you use a word processing program, the program can sort the list by date, author, or type of document.
When you use a word processing program, you can change the font to highlight test data and other important information. You make it easier to find important information.
Tip: Download a Master Document List with information.
When you organize your child's file, you will learn about your child's disability and educational history. This is an important step in becoming an expert. When you finish this job, you will have a clearer understanding of your child's educational needs.
You do not need to complete the "Significance" column yet. When you learn more about evaluations and test scores, you will recognize important information in documents.
Tip: See how a Master Document List is used to create an Exhibit List for a due process hearing.
In Summation
When you organize your child's file, the process of organizing information helps you understand your child's disability, history, and educational needs. When you create your Master Document List, you can find a specific document quickly and easily - a good thing at meetings.
More Articles About Documents and Organizing Information
The Paper Chase: Managing Your Child's Documents Under the IDEA by Bob Crabtree, Esq. If you have kids with special educational needs, you can be overwhelmed by paperwork in no time. This article teaches you about the importance of different documents and how to organize them. You learn about documents that are keepers; education records; documents you should create and how; tips for consulting with an attorney.
Paper Trails: Documents, Exhibit Lists and Due Process Hearings by Pete Wright. This is one of several articles about documents that was published in the Fall 2001 issue of The Beacon.
Paper Trails, Letter Writing and Documentation. When you advocate for a child, you use logs, calendars, and journals to create paper trails.
Revised 07/21/08